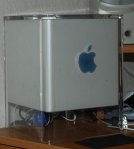
 After I got married, I wanted my wife to have a better computer. She was using a 2nd-hand windows computer that was pretty under-powered. She barely used it, so it wasn’t really an issue at the time. An opportunity arose and she ended up with a Power Mac that was several years old. It was free, and that was really nice. It was nice for a little while anyway. As her needs became greater, she became more and more frustrated with the unresponsiveness of her machine, I kept searching for a solution.
Enter the Hackint0sh…
Note: I added and updated some pictures.
Back in October, I was very excited to put together a mini file server. I based my design on Paul Stamatiou’s DIY $200 PC. I wanted to implement FreeNAS on it and use it as a backup spot, as well as file storage for media, and my wife’s photography. Sadly, I found out that FreeNAS didn’t have a driver for the D945GCLF’s NIC. I imagine that with some creative work you can figure it out, but I didn’t find any information on such a thing. At the time I had my heart set on supporting 4 SATA drives and it was either those 4 drives on a PCI card, or get a PCI NIC card so I could use it. I grunted and did neither because my fun money was all used up for the time being.
When poking around for information about the board, I stumbled across a comment at NewEgg about the board I’d purchased. Apparently someone had just bought to use as a Hackint0sh. If you’re not down with the lingo, a Hackint0sh is a non-Apple computer that runs Mac OS X. Since Apple made the switch to Intel processors, build a computer that can run OS X has been increasingly easier.
I said to myself “Hey! I have this board, and nothing to do with it! I’ll make it a Mac” and then “Hey! My wife needs a new computer!”, thus began my plan to replace her G4 with an Intel Atom. Somewhere in the process, I also stumbled across one of these:
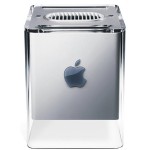
You might remember it. Circa 2000, Apple comes out with it’s regular faire of computers, and then, in classic Steve Jobs style, they tell us that they managed to stuff all the same equipment into a box a quarter of the size. I always thought the G4 Cube was a cool device, I don’t think I ever wanted one though. I had just barely bought a G4 tower 6 months earlier, and in the long run it turned out that most people preferred the option of expansion over the futurist minimalism. I stumbled across someone who’d hacked a mini-ITX board into one and I got excited.
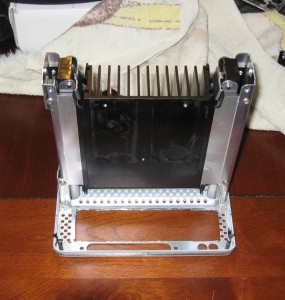
Intel markets the D945GCLF as a mini-ITX form factor board. The mini-ITX specification reads that the board is 170mm square. Intel’s mini-ITX is 171.5mm square. I always thought millimeters were small enough to be rather inconsequential, but it turns out they can really ruin your day if you let them. The board was just barely too wide to fit inside the chassis. I did what any good geek would do: Cut the thing until it fit. (Before you panic, I cut the chassis, not the board.) Cube geeks, please take a moment of silence for the loss of your beloved.
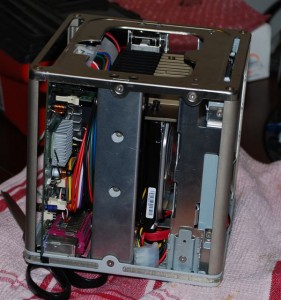
The chassis is pretty strong steel. I wasn’t worried about weakening the form too much. I added cuts on either side to allow the board to sit there. You might see in the photo some black electrical tape around the edges. This was an early attempt to insulate the board from the chassis, but it’s really not necessary. I gave up on it.
This shows how compact the little thing is. What it doesn’t show is what Apple’s engineers did to get this all inside this little package. It’s amazing the engineering that went into this thing. I’m almost… almost sad to have pulled it apart. Then again, I was a man with a project.
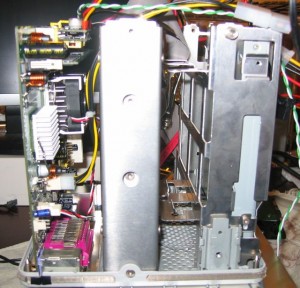
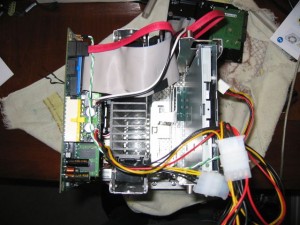
The madness from the top of the machine. On the left, kind of in the middle you can see the power supply. If you don’t have absurd power needs for your machine, I highly recommend the pico PSU, great little PSU mounted all on the ATX 20pin plug. SATA for the Hard Drive, IDE for the DVD-ROM. I considered replacing the disc drive with a slim slot-loading burner, but I wasn’t sure it would be worth it. We don’t use optical media around here very often.
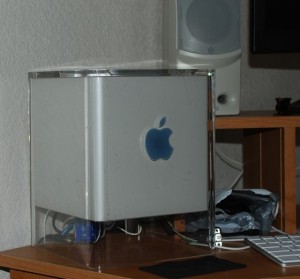
Here’s the whole package put together in it’s cage. This thing slips into the acrylic case.
This is where it now sits, in the corner of my wife’s Desk. If you’ve got questions, shoot me an email or head over to the insanelymac.com forums, The folks there were tremendously helpful while I was working on mine.
I have a FreeNAS install now but after the number of computers in the house outnumbered humans I decided to minimize. I plan on buying a new G-Tech G-Drive Q (FireWire) to replace the one connected to my Mac mini. Then attach the other drive directly to the Time Capsule. I can then toss the old PC serving as my FreeNAS server.
Damn that’s cool. I award you 25 man points and 50 geek points for assembling such an amazing piece of pure awesome.
Thanks! It runs a bit louder than I wish it did, but then I’m spoiled by my iMac which is virtually silent.