A month or so ago I came across a video about someone building their own keyboard. I was sort of fascinated by the project because I’d noticed how my hands became contorted whenever I needed to type. My dad had owned an Apple ergonomic keyboard when was a teenager, and I’d used it lots of times while I was playing my way through Myst. I didn’t ever really understand what it was for.
After watching a dozen videos and trying to hack my way through a handwired keyboard, I am laboriously typing this on my new split keyboard. This is how I got here.
The Corne 5
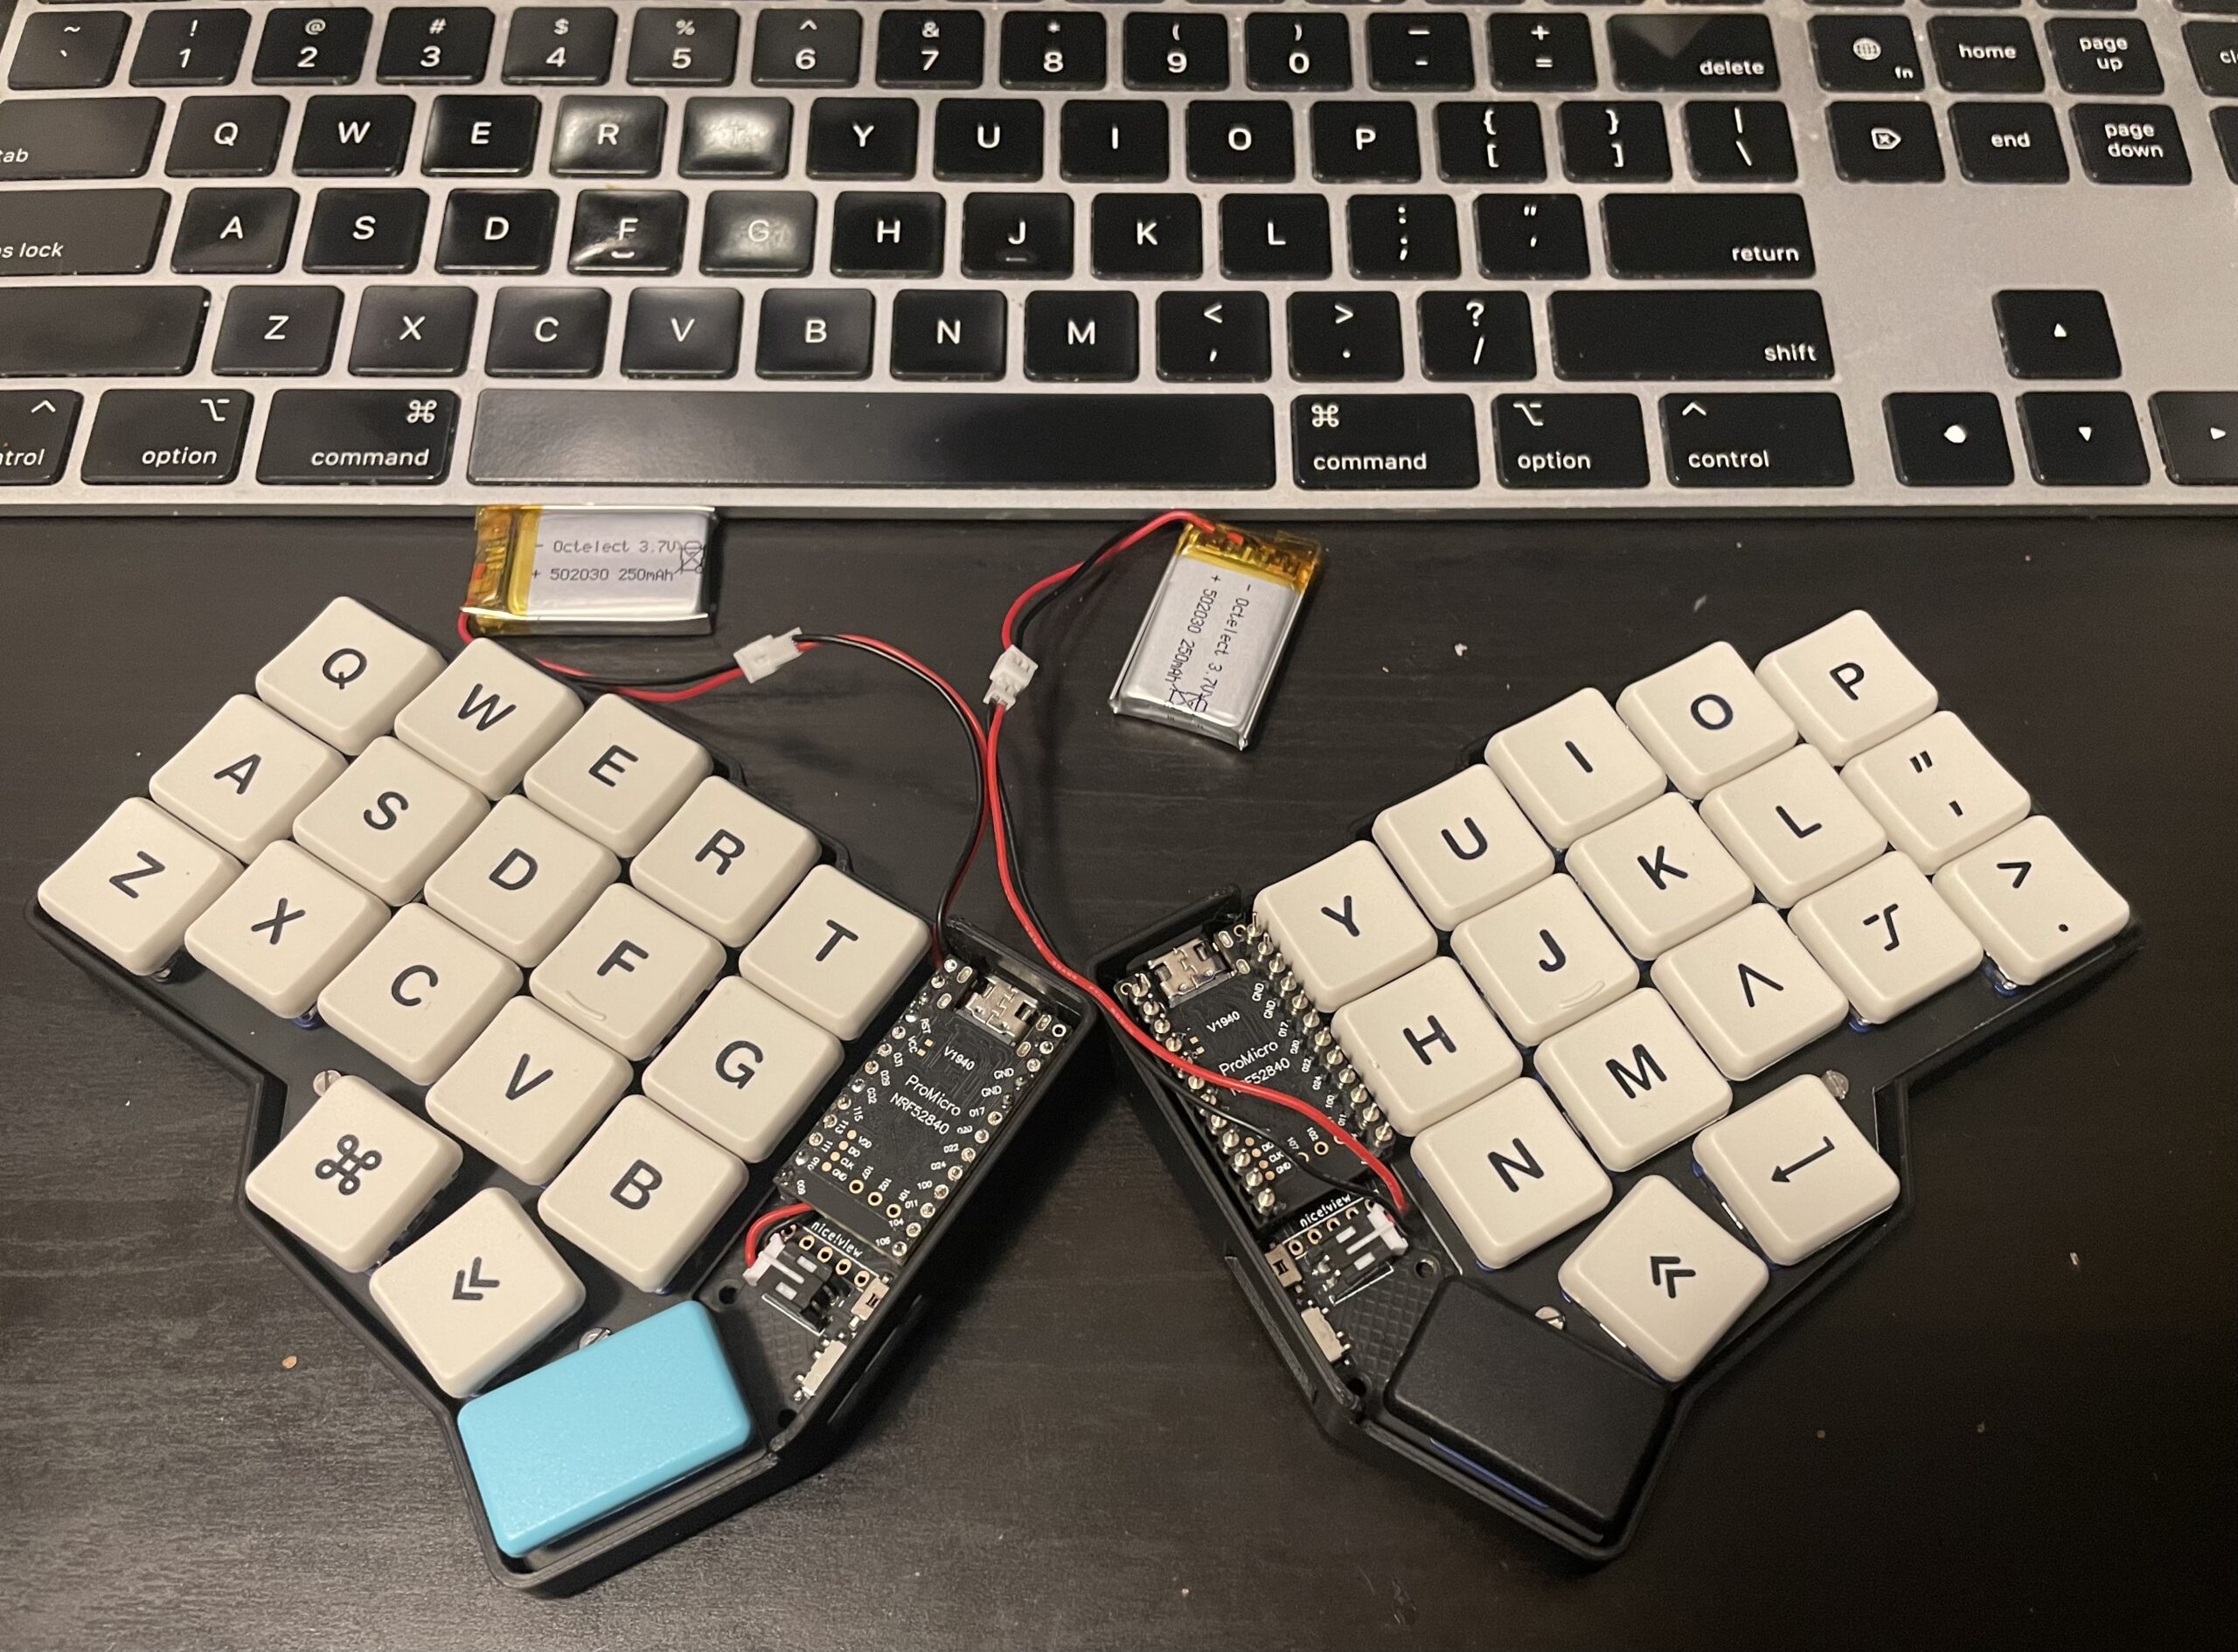
The layout of this keyboard is called a Corne 5. Corne is that name of the style of keyboard and the 5 refers to the number of columns. The more common Corne is 6 columns per side and includes a few extra keys. I had originally planned on making a Ferris Sweep, which is a lot like the Corne 5 but has one fewer thumb keys. When my original handwired plan didn’t go as smoothly as I hoped, I decided to buy a Corne 5 PCB Because it was quicker than anything else.
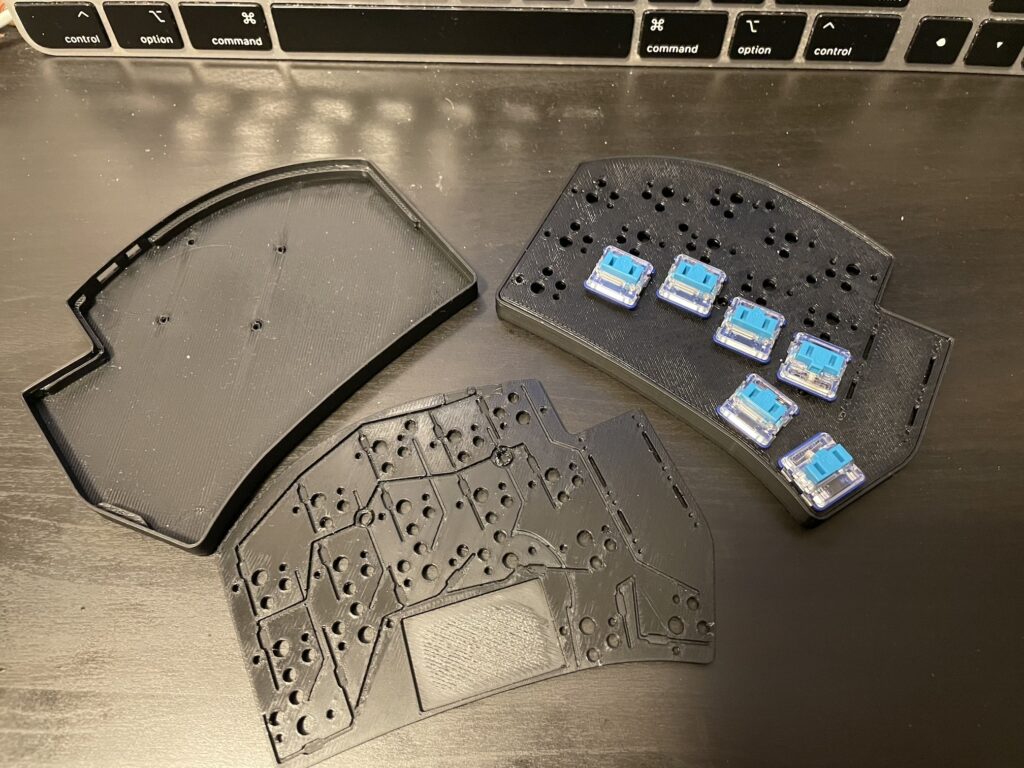
My setup is a bit silly. I ordered the wrong number of keycaps and that wrong number headers for the controllers. These are special headers that have smaller than typical pins. That lets you put them in a lot shorter. I ordered the wrong pins and so one side sticks up quite a lot farther than intended. Also the batteries I had were too big for where the design intended the batteries to go. So right Now they’re hanging off to the side. Oh well.
Typing on it.
The first switches that I purchased were Kaihl Choc v1 blues. after installing these and trying to type with them, I found myself missing a lot of keypresses. A lot. Some of that is the reality of using light switches. I don’t know how you type but I rest my fingers on the keys, and my main keyboard up until this point has been the Apple Magic Keyboard, which has both keys with low travel and reasonable force (somewhere around 32 grams of force.) Whereas these switches need just 25 grams. I ordered a couple of different kinds of switches – orange switches require 50 grams of force to actuate and brown switches require 35 grams an have a light bump to them when you press them.
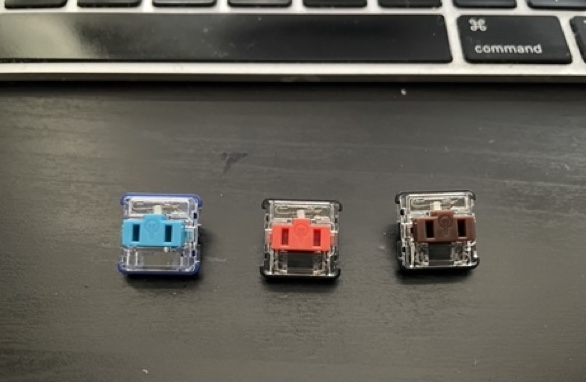
First I tried swapping out the orange for the blue. It was definitely an improvement but it’s still a bit of a challenge to type at speed. For me, the orange switches are right on the cusp of being too heavy. They Are a little bit of a workout to make work. As I’ve been writing this, I have swapped out the switches again for the brown switches and I’ve found that they work the best for me so far. Or at least are resulting in the lowest number of typos yet. I’m tempted to say that swapping out the key caps might improve things further, but that is a problem for another day.
My typing speed is (as expected) much slower. When I really get going I find myself reaching for the delete key up in the corner. I usually hit the P key and have to walk it back. If nothing else, this has exposed how much my personal typing style has differed from standard typing practice. Before this adventure, I was typing at about 65 words per minute on the magic keyboard. On the Corne I’m typing about 40 wpm with a lot of errors. To make matters worse, its also negatively impacted my typing on the magic keyboard.
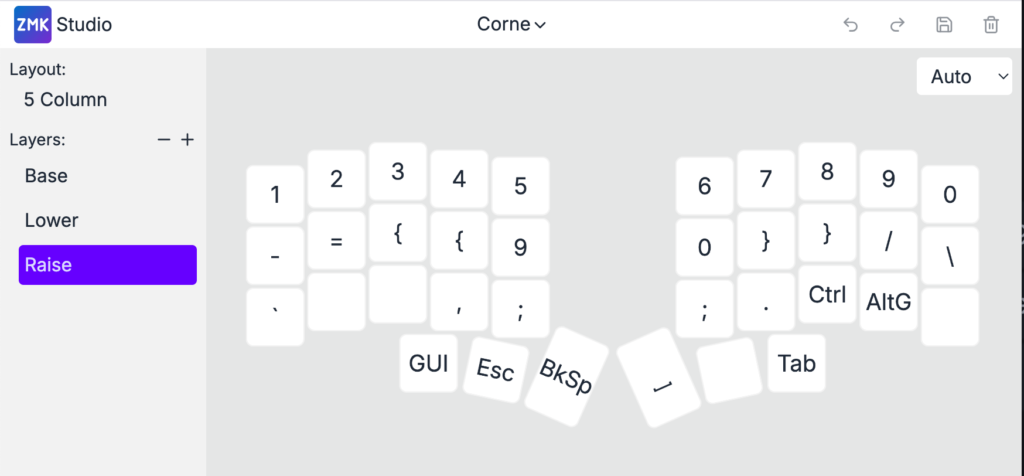
Layers & Layout
If you looked at the picture above, you may have noticed a distinct lack of modifier keys. That is, there are no shift keys, and in some cases there aren’t even keys for normal things like commas. My keyboard handles these sorts of issues through layers. All the alphabet characters are immediately accessible. Additionally, capitalizing is done simply through holding the key down a little longer. On the bottom row there are thumb keys. The big keys are space and backspace and the outer keys are the Mac’s command key and Return.
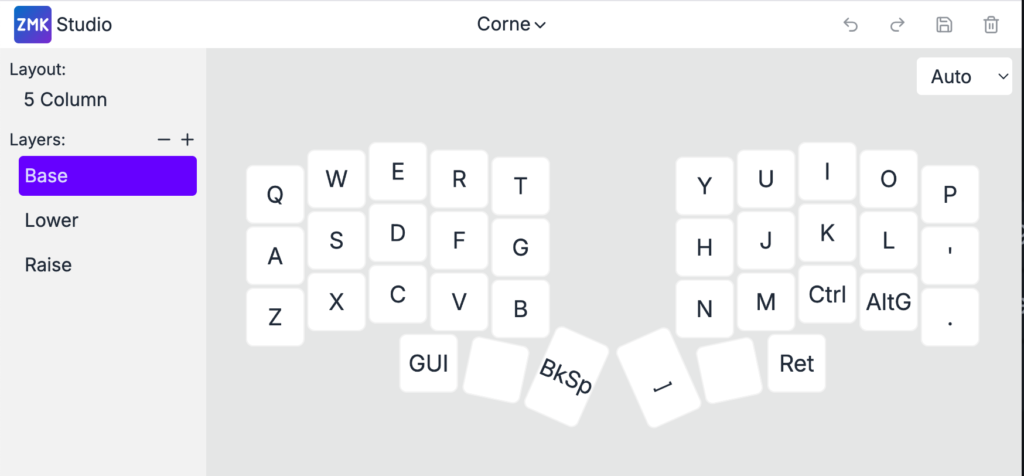
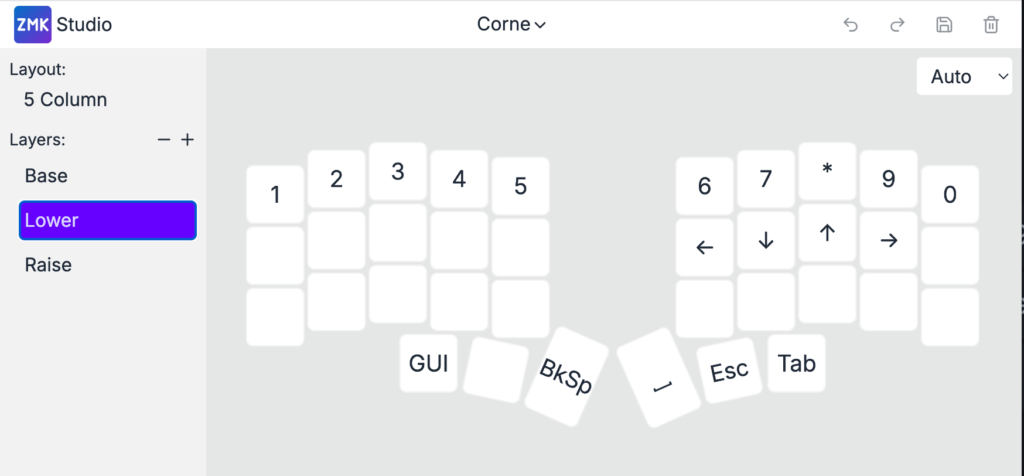
The middle two keys that are used to go up and down the layers. Some keyboards have sticky layers that move you to a layer until you explicitly move back. Mine is not like that and I can only go up and down by holding the key.
There are still a few characters that are not directly represented in the layout – mostly characters that are under the shift key on a normal keyboard. Another unusual factor are the arrow keys. They are all in a line like 80s era computer keyboards, instead in an inverted T as on modern extended keyboards. Instead of getting into using that i’m more likely to simply have a dedicated numpad somewhere, but I haven’t really decided anything about that. As I Write this, I’ve actually made some changes to the layout in the images above. I now have media controls on the bottom of the left module and volume on the bottom of the right.
I guess I’m that guy now…
One of the things about this keyboard stuff is that it kind of sucks you in. All of this started for me because I didn’t like the way I had to position my hands in order to type on the keyboard that I already had. Then it was a matter of finding the right switches. I’m already designing my own keyboard in using switches designed for laptops to see if I can get a nicer feel with less travel. And kind of also just to see if I can do it.
If I get there, I’ll write about it here. Hopefully with slightly better typing accuracy.